
こんにちは。SCSKのふくちーぬです。
前回、フリートマネージャー経由でのWindowsサーバ接続時にPowerShellのキーボード入力機能を動作させるための方法をご紹介しました。こちらの記事を読んでいない方は、是非ご一読ください。
今回は、閉域網環境内で実現させるための方法をご紹介します。
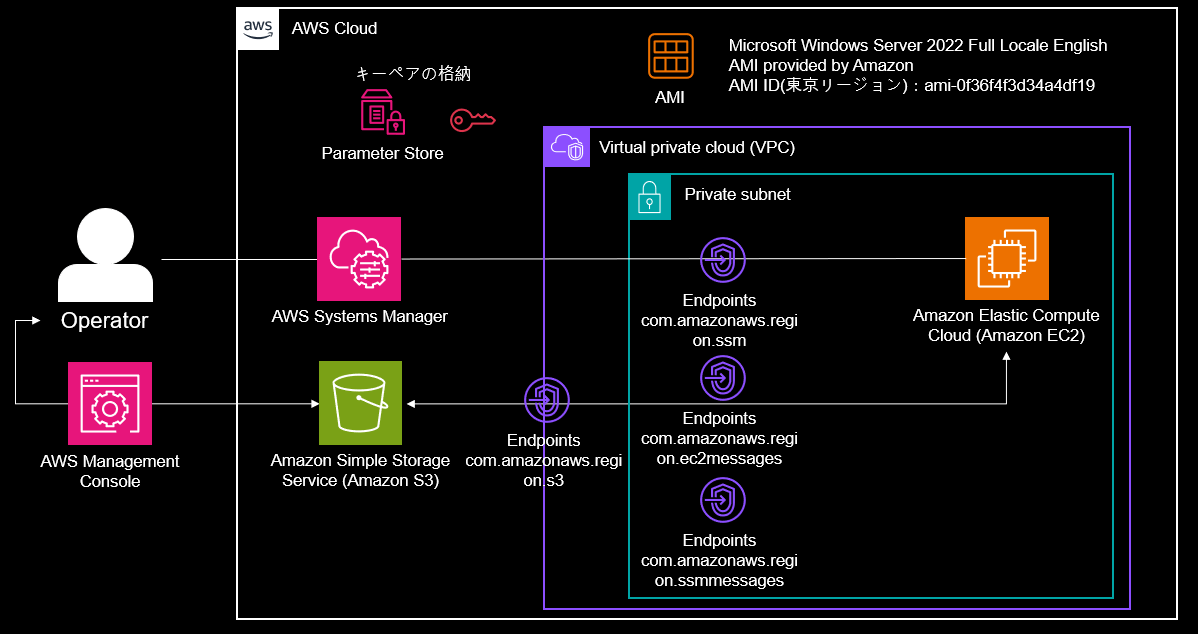
アーキテクチャー
- インターネットゲートウェイ、NATゲートウェイが存在しない閉域網ネットワーク(プライベート環境)とする。
- Systems Managerの管理下にするために、EC2はマネージドインスタンスとする。また、OSはWindows Server 2022を利用します。
- 運用者は、フリートマネージャーを利用してEC2に接続します。
- 運用者は、マネジメントコンソールやAPIを利用してS3にアクセスしファイルのやり取りをします。
- プライベートサブネット内のEC2は、VPCエンドポイント経由でS3にアクセスしファイルのやり取りをします。
完成したCloudFormationテンプレート
以下のテンプレートをデプロイしてください。
AWSTemplateFormatVersion: 2010-09-09
Description: CFN template EC2
Parameters:
  ResourceName:
    Type: String
  AMIId:
    Type: String
Resources:
  # ------------------------------------------------------------#
  # S3
  # ------------------------------------------------------------#
  S3BucketFor:
    Type: AWS::S3::Bucket
    DeletionPolicy: Delete
    Properties:
      BucketName: !Sub ${ResourceName}-s3-bucket
      AccessControl: Private
      PublicAccessBlockConfiguration:
        BlockPublicAcls: true
        BlockPublicPolicy: true
        IgnorePublicAcls: true
        RestrictPublicBuckets: true
  # ------------------------------------------------------------#
  # VPC
  # ------------------------------------------------------------#
  VPC:
    Type: AWS::EC2::VPC
    Properties:
      CidrBlock: 10.0.0.0/16
      EnableDnsSupport: true
      EnableDnsHostnames: true
      Tags:
        - Key: Name
          Value:  !Sub ${ResourceName}-VPC

  # ------------------------------------------------------------#
  # Private Subnet
  # ------------------------------------------------------------#
  PrivateSubnet1a:
    Type: AWS::EC2::Subnet
    Properties:
      VpcId: !Ref VPC
      CidrBlock: 10.0.1.0/24
      AvailabilityZone: ap-northeast-1a
      MapPublicIpOnLaunch: false
      Tags:
        - Key: Name
          Value: !Sub ${ResourceName}-subnet-Private-1a

  PrivateSubnet1c:
    Type: AWS::EC2::Subnet
    Properties:
      VpcId: !Ref VPC
      CidrBlock: 10.0.11.0/24
      AvailabilityZone: ap-northeast-1c
      MapPublicIpOnLaunch: false
      Tags:
        - Key: Name
          Value: !Sub ${ResourceName}-subnet-Private-1c

  # ------------------------------------------------------------#
  # Route Table and Routes
  # ------------------------------------------------------------#
  PrivateRouteTable:
    Type: AWS::EC2::RouteTable
    Properties:
      VpcId: !Ref VPC
      Tags:
        - Key: Name
          Value: PrivateRouteTable

  PrivateSubnet1aAssociation:
    Type: AWS::EC2::SubnetRouteTableAssociation
    Properties:
      SubnetId: !Ref PrivateSubnet1a
      RouteTableId: !Ref PrivateRouteTable

  PrivateSubnet1cAssociation:
    Type: AWS::EC2::SubnetRouteTableAssociation
    Properties:
      SubnetId: !Ref PrivateSubnet1c
      RouteTableId: !Ref PrivateRouteTable

  # ------------------------------------------------------------#
  # VPC Endpoint
  # ------------------------------------------------------------#
  ssmEndpoint:
    Type: AWS::EC2::VPCEndpoint
    Properties:
      ServiceName: !Join
        - ''
        - - com.amazonaws.
          - !Ref 'AWS::Region'
          - .ssm
      SubnetIds:
        - !Ref PrivateSubnet1a
        - !Ref PrivateSubnet1c
      VpcId: !Ref VPC
      VpcEndpointType: Interface
      SecurityGroupIds:
        - !Ref VPCeSecurityGroup
      PrivateDnsEnabled: true

  ec2messagesEndpoint:
    Type: AWS::EC2::VPCEndpoint
    Properties:
      ServiceName: !Join
        - ''
        - - com.amazonaws.
          - !Ref 'AWS::Region'
          - .ec2messages
      SubnetIds:
        - !Ref PrivateSubnet1a
        - !Ref PrivateSubnet1c
      VpcId: !Ref VPC
      VpcEndpointType: Interface
      SecurityGroupIds:
        - !Ref VPCeSecurityGroup
      PrivateDnsEnabled: true

  ssmmessagesEndpoint:
    Type: AWS::EC2::VPCEndpoint
    Properties:
      ServiceName: !Join
        - ''
        - - com.amazonaws.
          - !Ref 'AWS::Region'
          - .ssmmessages
      SubnetIds:
        - !Ref PrivateSubnet1a
        - !Ref PrivateSubnet1c
      VpcId: !Ref VPC
      VpcEndpointType: Interface
      SecurityGroupIds:
        - !Ref VPCeSecurityGroup
      PrivateDnsEnabled: true

  S3VpcEndpoint:
    Type: AWS::EC2::VPCEndpoint
    Properties:
      ServiceName: !Join
        - ''
        - - com.amazonaws.
          - !Ref 'AWS::Region'
          - .s3
      VpcId: !Ref VPC
      VpcEndpointType: Gateway
      RouteTableIds:
        - !Ref PrivateRouteTable

  # ------------------------------------------------------------#
  # Security Group
  # ------------------------------------------------------------#
  SecurityGroup:
    Type: AWS::EC2::SecurityGroup
    Properties:
      GroupDescription: For EC2
      VpcId: !Ref VPC

  VPCeSecurityGroup:
    Type: AWS::EC2::SecurityGroup
    Properties:
      VpcId: !Ref VPC
      GroupDescription: For VPCEndpoint
      SecurityGroupIngress:
        - SourceSecurityGroupId: !Ref SecurityGroup
          IpProtocol: tcp
          FromPort: 443
          ToPort: 443

  # ------------------------------------------------------------#
  # IAM Role and Instance Profile
  # ------------------------------------------------------------#
  SSMRole:
    Type: AWS::IAM::Role
    Properties:
      RoleName: !Sub ${ResourceName}-ec2-role
      AssumeRolePolicyDocument:
        Version: '2012-10-17'
        Statement:
          - Effect: Allow
            Principal:
              Service: ec2.amazonaws.com
            Action: sts:AssumeRole
      Path: /
      ManagedPolicyArns:
        - arn:aws:iam::aws:policy/AmazonSSMManagedInstanceCore
        - arn:aws:iam::aws:policy/AmazonS3FullAccess

  InstanceProfile:
    Type: AWS::IAM::InstanceProfile
    Properties:
      Roles:
        - !Ref SSMRole

  # ------------------------------------------------------------#
  # EC2 Key Pair
  # ------------------------------------------------------------#
  KeyPair:
    Type: AWS::EC2::KeyPair
    Properties:
      KeyName: !Sub ${ResourceName}-key

  # ------------------------------------------------------------#
  # EC2 Instance
  # ------------------------------------------------------------#
  EC2Instance:
    Type: AWS::EC2::Instance
    Properties:
      InstanceType: t2.micro
      ImageId: !Ref AMIId
      SubnetId: !Ref PrivateSubnet1a
      IamInstanceProfile: !Ref InstanceProfile
      SecurityGroupIds:
        - !Ref SecurityGroup
      KeyName: !Ref KeyPair
      Tags:
        - Key: Name
          Value: !Sub ${ResourceName}-ec2
解決策
PSReadlineモジュールをローカルでインストールします。その後サーバに移送し、モジュールを読み込ませることで対応できます。
PSReadlineの手動インストール
下記サイトにて、PowerShellモジュールをインストールすることができます。今回は、最新バージョンの2.3.5を選定しました。

“Manual Download”を押下します。
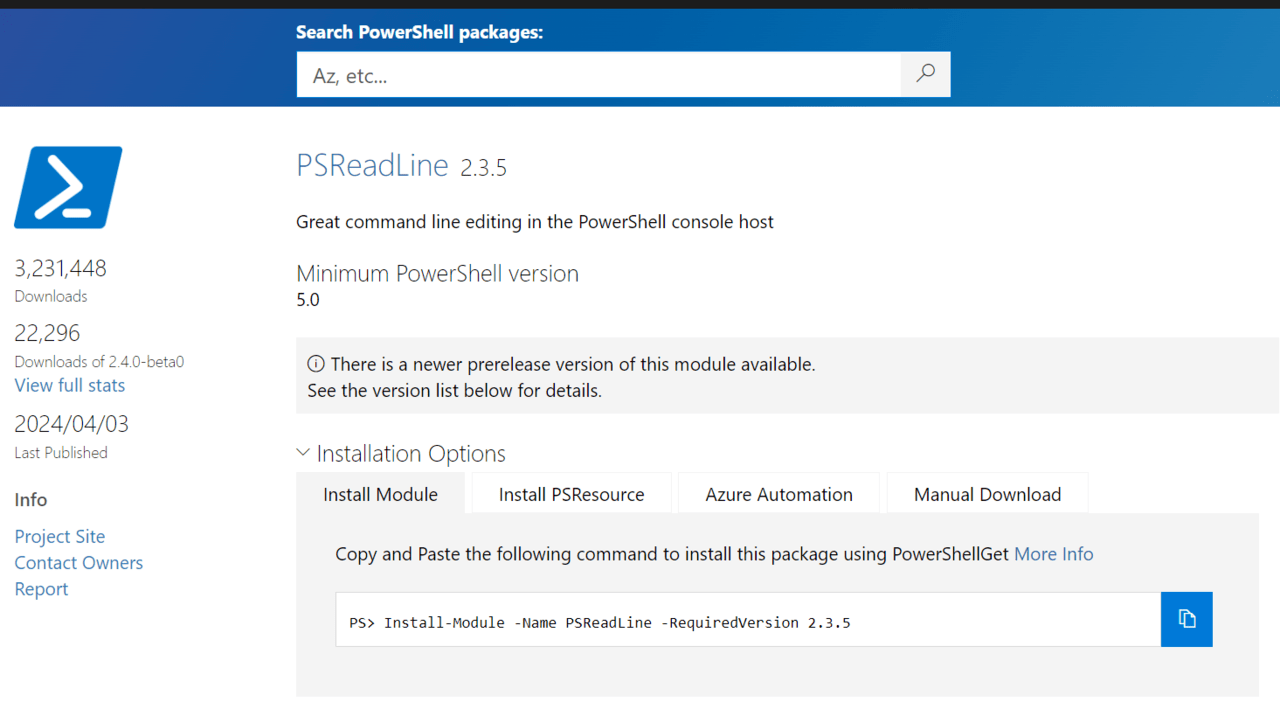
“Download the raw nupkg file”を押下して、バイナリファイルをダウンロードします。

ファイルの拡張子をzipに変更します。
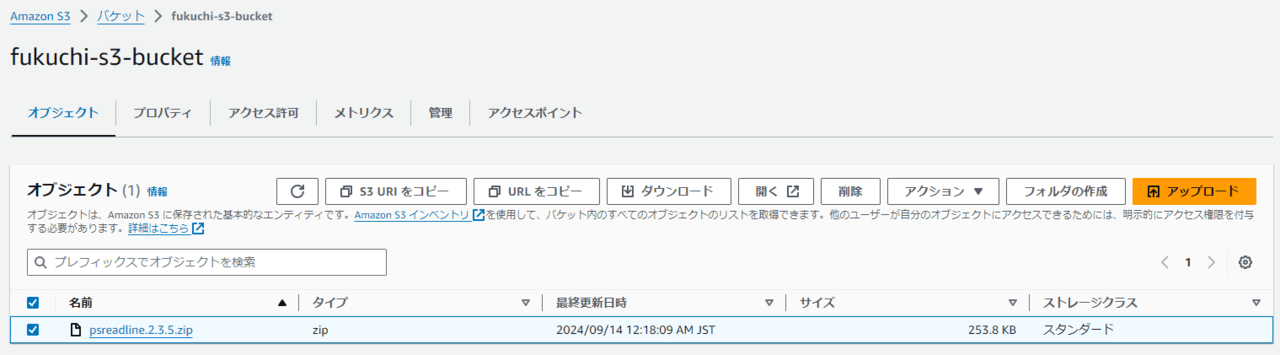
S3へのアップロード
S3に”psreadline.2.3.5.zip”ファイルをアップロードします。
キーペアの値を確認し、EC2に接続
下記記事を参考に、同様の手順でEC2にフリートマネージャー経由で接続します。
Read-S3Objectコマンドの実行
下記記事を参考に、同様の手順でPowerShellで下記コマンドをコピー&ペーストで実行します。

Read-S3Object -BucketName <Bucket Name> -Key <Object Key> -File <Local File Path>
例として、以下のコマンドになります。
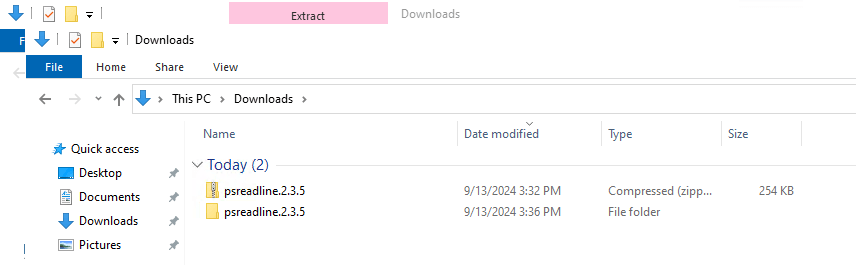
Read-S3Object -BucketName fukuchi-s3-bucket -Key psreadline.2.3.5.zip -File C:\Users\Administrator\Downloads\psreadline.2.3.5.zip
サーバ上にダウンロードできれば下記画面が表示されます。

モジュールの入れ替え
ダウンロードしたzipファイルを解凍しておきます。
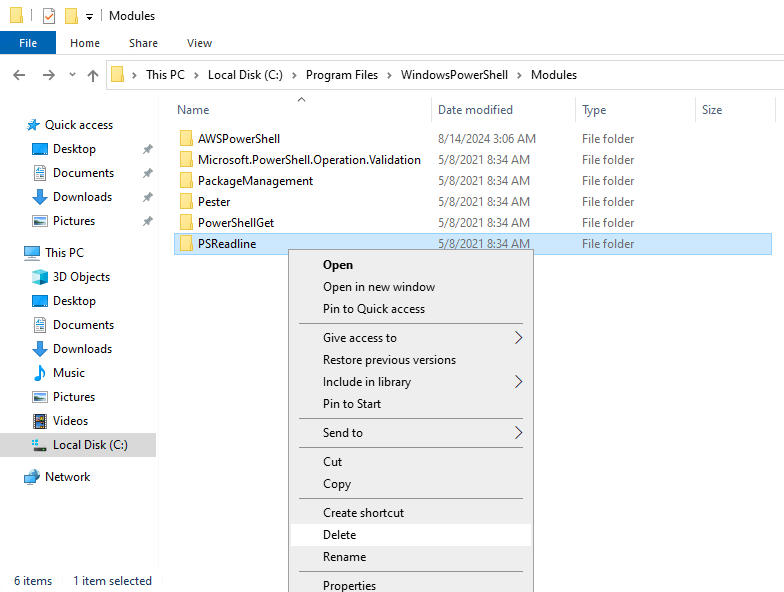
以下のディレクトリ配下の”PSReadline”フォルダを削除します。
└C:\Program Files\WindowsPowerShell\Modules
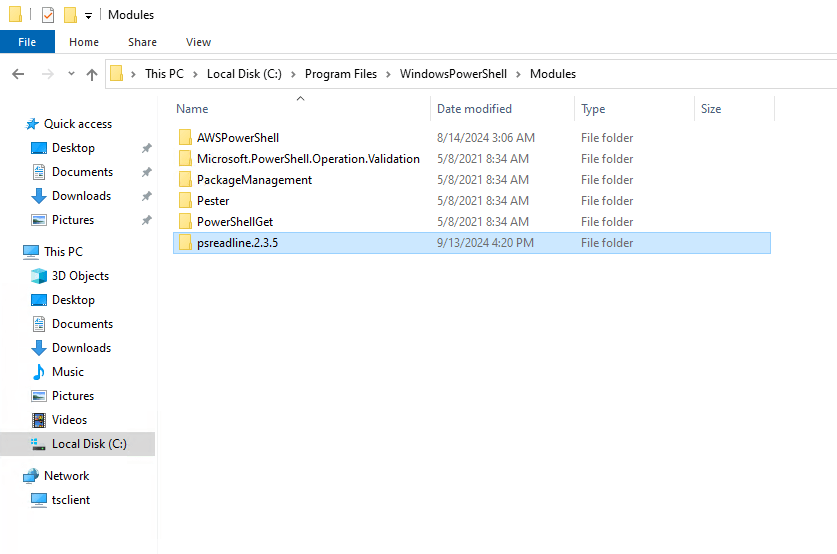
その後、”psreadline.2.3.5″フォルダをコピーします。
再度PowerShellを起動し、キーボードから任意の文字を入力してみます。
無事にキーボード入力が機能しましたね。

最後に
いかがだったでしょうか。
フリートマネージャー経由で閉域網のWindowsサーバに接続する必要がある場合でも、モジュールを持ち込むことでPowerShellを正常に機能させることができます。
本記事が皆様のお役にたてば幸いです。
ではサウナラ~?